ULearnOffice.com

Navigation

Previous
Next
Homepage
FAQ
What's new
Sitemap

Topics

Introduction
Basic commands
Presentation
Page layout and printing
Functions
Copy, Paste and
relative and absolute references

Charts (graphics)
Macro commands
Analysis tools
Comments
Data list
Pivot table
Exercise: creating a model
Quiz

Tutorials

Word
Excel

Excel 2007/2010/2013
PowerPoint
Access

Others

Demonstration files
Texte en français

Contact

By e-mail
Join our Newsletter

Excel - Presentation

Introduction
Improve the presentation of your worksheet

Copy the formatting
Autoformat
Conditional formatting

Introduction

Generally, it's not enough to create a model with the spreadsheet. You must be able to present the results to other people; either your boss or your client. This page is dedicated to improving the presentation of the worksheet.

Here are some of the options that can be used to improve the presentation of your worksheets.

Change the font, the size and color of the text in the cells.
Add titles to each parts of the document.
Center the titles with regard to a series of cells.
Insert spaces between each of the parts of your document.

Improving the presentation of your worksheet

Often, you will have to present the results of your spreadsheet to many people. There are several possibilities available for improving the presentation. Excel offers you these options in two different ways: by using the Format toolbar or the main menu under the Format and Cell options.


Format toolbar

If you don't see this toolbar in the screen, make the following operations.

*From the Edit menu, select the Toolbar option.
*From the list of the toolbars that are available to you, select the one named Format.

The Format toolbar groups together several possibilities.

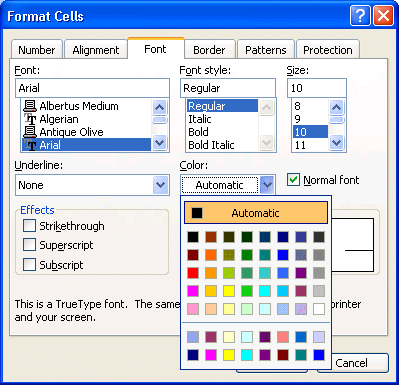
You can change the font, the size as well put the text in bold, italic or underlined.

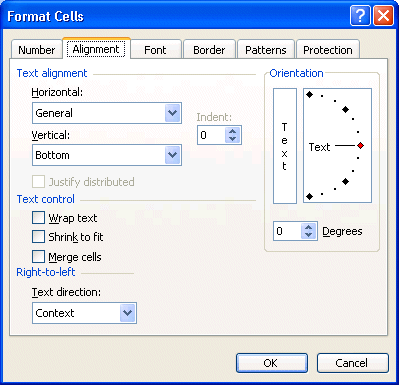
You can align the text or the number in the cell to the left, the middle or to the right side of the cell. You can also align the text on to several columns. This is designed to align a main title over several columns. Write the text that you want to center in the leftmost cell you then make a block with the test that you want centered. Then press on the fourth button for the alignment, that the one with the letter " a " and two horizontal arrows.

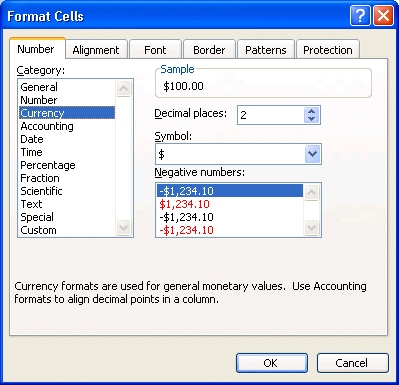
You can also change the presentation of the numbers in the cells. You can place the monetary format with two decimals, the percentage format, or group together numbers by the thousands. Youcan also add or remove decimals in the presentation. But this is only for presentation purposes. It does not affect the real number in the cell. For example, if the true number of the cell is 12,4 and that you want to present it without a decimal, the number that will appear in the cell will be 12. However Excel will use the "true" value to make any calculations. So, the result of the cell multiplied by 5 will not be 60 (5 * 12) but really 62 (5 * 12,4).

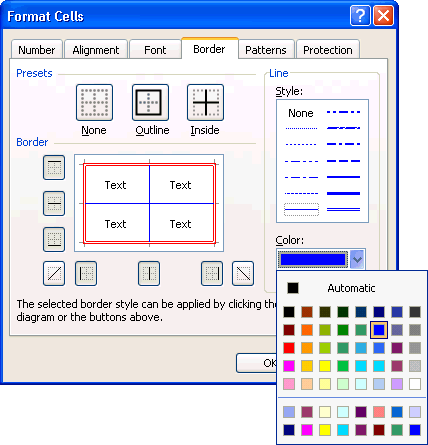
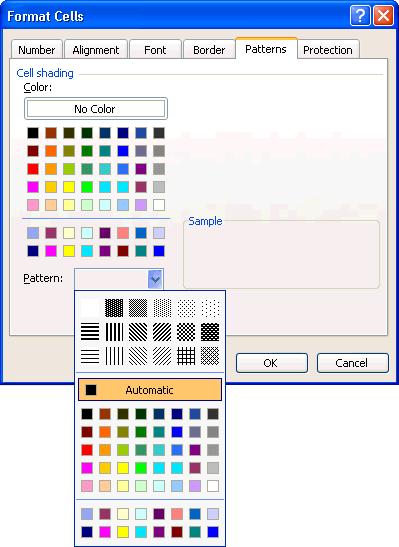
You can also change the presentation of the cell itself. You can frame the cell or a group of cells, with various types of rows. Change the background color and the pattern of the cell. With the last option of the toolbar, you can modify the color of the text. This can bo done for one letter or the entire content of a cell.

Format of the cell

There are other ways of changing the presentation of your file. In the main menu under the menu Format and Cell options, you will find all the options available to modify the presentation, including others that are not in the Format toolbar. You will find the options under the following six tabs.

*Select a cell or a range of cells.
*From the Format menu, select the Cell option.
*If it's not already done, select the Numbers tab.

In this window, there are six tabs that offer all the possibilities for cell presentation. As you can see, there are a lot more options available from the Format toolbar. Under the first tab you will find the options to change the presentation of numbers. In the categories box, there are several styles of presentation for numbers and text. You can even personalize the presentation according to your needs. In the right part of the window, you have options according to the style of presentation that you chose. In the picture on the left side, you can determine the number of decimals that will be shown, the monetary symbol and the color of the number if it's negative. You can even personalize the numbers according to your needs.

*Click on the Alignment tab.

From this window, you can adjust the text within a cell. You can paste the text horizontally to the left or right side of the cell's border. You can adjust the vertical position of the text within the cell by changing the position to the bottom or to the middle of the text. One of the new options allows you to change the orientation of the text. You can also give an angle to your text! This is interesting for titles and some descriptions. However do not exaggerate its use.

From this window, it's also possible, to merge or demerge cells. To merge you must first make a block with the cells to merge you want merged. Then go to the window to the left in order to activate the " Merge cells " option. To remove the fusion, deselect the last option.

*Click on the Font tab.

From this window, you can modify the characters of the cells. You can also change the font, the style, the size, the background and the color of the text.

*Click on the Border tab.

From this window, you can determine the outline of a cell or a range of cells. You can choose the style of the row (none, simple, double, thick...) and the color of your choice of the right-hand side of the window.

From the left-hand side, you can chose the place you want the row to appear by pressing on one of the buttons surrounding the outline. You can also click inside the outline to fix the rows.

*Click on the Patterns tab.

Excel offers you also the possibility of modifying the color of the cells and even adding a pattern to it. Always verify that the text remains visible when chosing a patern.

.

*Click on the Protection tab.

This tab is very practical when you want to protect a workfile. It prevents other users from modifying formulas but still permits them to view and use the worksheet. The Excel protection option will protect all your worksheets. The protection tab allows you to lock or unlock cells within the worksheet.

The protection is made in two stages.

You must indicate to Excel the cells that you want to unlock. It's these cells that the users will be allowed to change.

All other cells will be locked and cannot be changed.

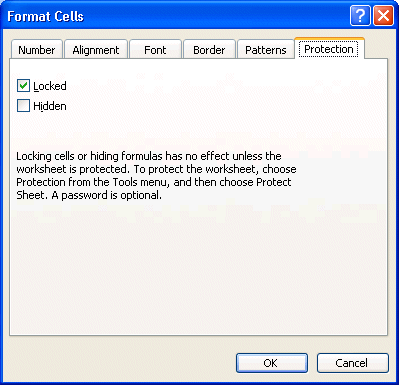
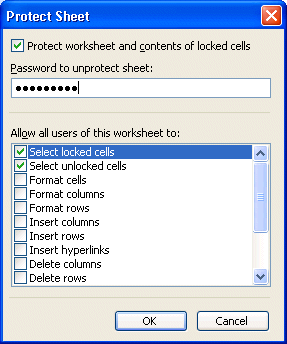
The second stage consists in protecting the worksheet or all the spreadsheet. When you'll have to unprotect the appropriate cells:

*From the Tools menu, select the Protection option.

Excel offers you the choice to protect the worksheet, the spreadsheet (the file) or to be able to share the document with the other people.

*For the moment, select the worksheet option.

You can determine the elements of the sheet that you want to be protected. You can also put in a password to protect the worksheet or the file.

It's however not compulsory. You can leave the empty box and the sheet will be always protected until somebody removes the protection. Do not worry if you put the protection and forget the password. There are software or macro for Excel that exists "to crack" the password. It's going to take only a few seconds to discover and remove it. To find these software, use a research site and look for the words crack or password and excel.

Be careful!
You cannot "crack" a password of a document without having first the permission from the owner of the file. Otherwise, you're in big trouble!!!

*Try to change the contents of a cell.

As soon as you go to try to change a value, Excel will present you the message above. The software warns you that this worksheet is protected and that you cannot change the contents of protected cells. For the moment, remove the protection on the worksheet.

*From the Tools menu, select the Protection option.
* Select the Remove the protection of the sheet option.

Copy a formatting style

The previous options showed you how to use all the formatting options. There is however a faster way to apply presentation style to other cells. You just have to copy an existing formatting style that's already in another cell by using the Reproduce the shaping button. The next exercise demonstrates how to use this option.

* Enter the text following in the appropriate cells.

If you don't see the toolbar with the Reproduce the shapingbutton:

* From the Edit menu, select the Toolbar option.
* Of the list of the available toolbars, activate the Standard toolbar.

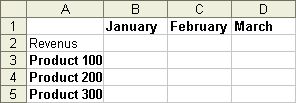
It's first necessary, to apply a presentation style to a cell.

* Place the cursor in the B1 cell.
*Press the button Fat.

It's now necessary to copy this format of presentation to the other cells of the example.

* Make sure that the active cell is the B1 cell.

It's the format of presentation of this cell that will be copied on the others.

* Press the Reproduce the shapingbutton .
* Click on the C1 cell.

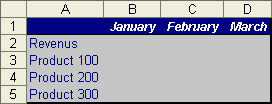
The format presentation style for January was copied on to February. It would have also been easy to apply the format to a range of cells such as for every month. The problem with this technique is that you must press the Reproduce the shapingbutton every time you want to copy the presentation style.

The designers of Excel found an easy method to apply the same presentation style to several blocks. The next exercise consists of applying a presentation style to several separate cells.

* Make sure that the active cell is the B1 cell.
* Double-click on the Reproduce the shapingbutton .

To click twice the Reproduce the shapingbutton will not be enough. It's necessary that you double click.

* Click on the D1 cell.
*Make a block with cells A3 for A5.
*Press again on the Reproduce the shapingbutton to deactivate the option.

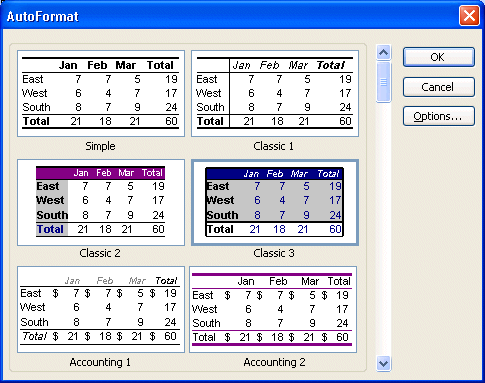
You now see how easy it's to quickly prepare a presentation for your spreadsheet. There is an even faster way: the automatic format.

Autoformat

You can spend a lot of time trying to improve the presentation of a file. Excel offers you, predefined formats for presentation. It's enough to apply the presentation style of your choice to the area of cells that you want.

*Select the area of your worksheet that you want to change the presentation.
*From the Format menu, select the Autoformat option.

*Select the format of your choice for the range of cells you selected.
*Press the OK button.

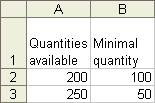
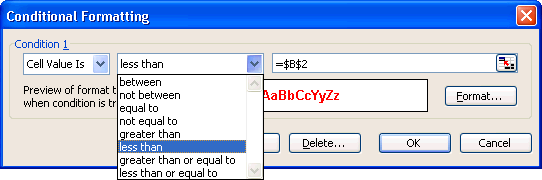
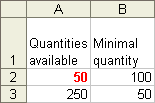
This is what you're data would be like when using one of the formats available. It took only a moment.

Conditional format

The conditional format allows you to change the presentation only when a series of events apply.

For the example below, you want the quantity available to appear in red when the is lower than the minimal quantity. The change in colour allowes you to notice more rapidly when your inventory is too low.

*Enter the text and the following numbers in the appropriate cells.

Note:
To be able to enter several rows of text in the same cell, you must use the Alt and Enter keys.

*Place the cursor in the A2 cell.
*From the Format menu, select the Conditional Formatting option.

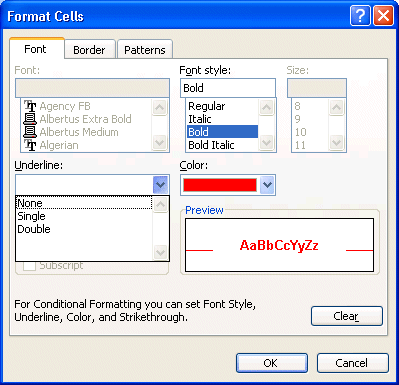
You must now write a condition and choose the kind of presentation when this condition occurs.

*For the first box, leave the option to The value of the cell is.

The second box determines the kind of condition. As you notice it's a very complete list.

*For the second box, select the Less than condition.

For this condition, you want to compare it with the contents of the B2 cell.

*For the third box, write in the box =B2.
OR
*Press the button in at the right of the box.
*Select the B2 cell.
*Press the button.

It's also possible to add up to 3 conditions and to change the presentation under different circumstances. You just need to press the Add button to add another condition. For the moment, there are no need for another condition.

*Press the OK button.

The conditional format is placed in the A2 cell. It's time to test it.

*Change the number of the cell A2 to 50.

Here is the result. The number is now in red. This happens only when the number of this cell is lower than the minimal quantity declared in B2 cell. You can add conditions or remove them. Experiment with different numbers and think where you could apply this option in your models.

Excel also allows you to copy the conditional format with the Reproduce the shapingbutton. The relative and absolute references apply also to the conditional format. In the last example, there is a difference between =B2 and =$B$2 when you go to copy the format on to other cells.


This site is hosted by 1&1.com